This article will give you a step-by-step guide on how to use the Calltracks interface wizard to help you create a span tag (number identifier). This means now you'll have the freedom and power to setup number identifiers and add them to client's website to track these calls.
Step 1) Login to Calltracks and go to 'Settings' >> 'Visitor Tracking'

Step 2) Once you have selected 'Visitor Tracking' it will show you a list of your current domains that have number identifiers in place as shown below. Select the correct domain for the span tag to be created under. To add a new span tag click on '+' on the right hand side.

Step 3) In the screen shots below we will explain what each field means:
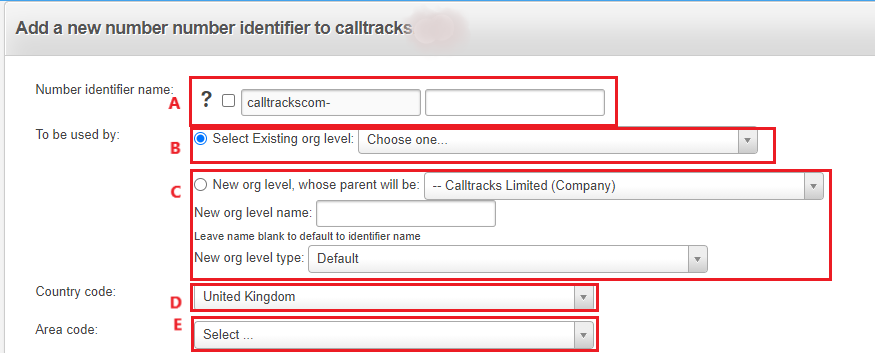
A) Number Identifer name: In the second field you can give a name to your number identifier. If you leave the box ticked in front of the first box your number identifier name will automatically prefixed with your login URL prefix for example 'calltracks'. This means if you name your number identifier 'GarageABC' and you leave this box ticked your number identifier name will be calltracks-GarageABC. If you leave it un-ticked the number identifier name will be only what you enter in the second field, so in this example ,"GarageABC"
B) To be used by: If you want the number identifier to fall under an existing org level select it from the dropdown list. (need to put a title for it like other sections) leaving the name blank to default to the number identifier name.
C) Org level: Make a selection of new org level or an existing org level that you want the span tag to sit on.
D) Country code: Select the country code of your number
E) Area code: Select the area code of the number
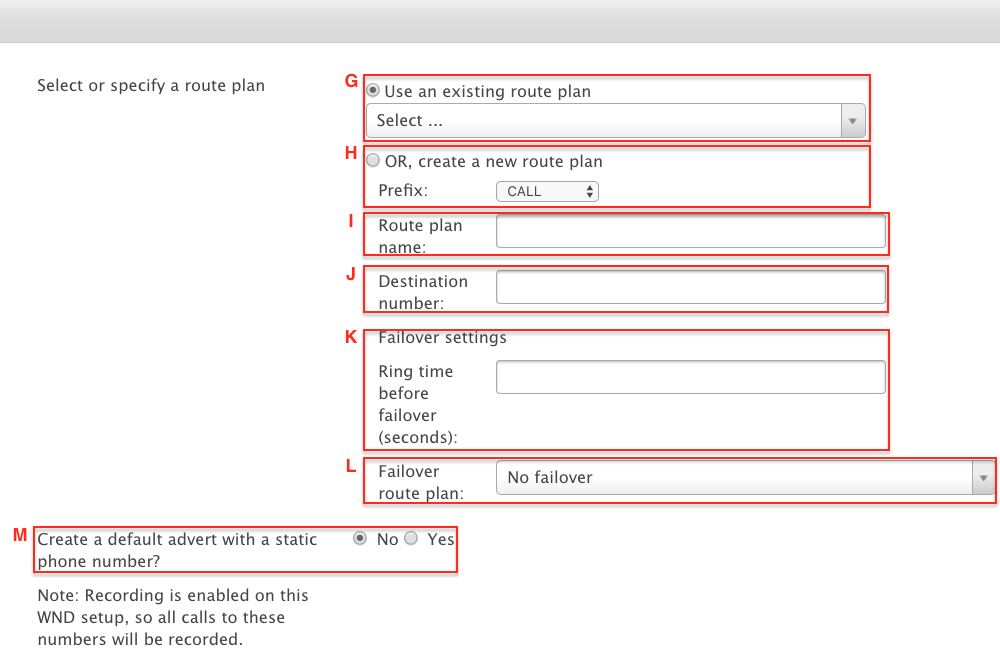
G) Use an existing route plan: Select this option if you already have a route plan running and select it from the dropdown list.
H) Create a new route plan: Select/tick this option if you wish the system to create a new route plan.
I) Route plan name: If you have chosen for the above then give your route plan a name
J) Destination number: Put the destination telephone number of your new route plan
K) Failover settings: Failover acts as an insurance policy on your telephone network. In the event of call not being picked up it will failover to another number. In here you can adjust the number of seconds it will failover to another route plan (telephone) number. (If you are unable to see this option please contact the support team for this to be enabled)
L) Failover route plan: Select the failover route plan (telephone) number from dropdown list.
M) Create a default advert with a static phone number? Select 'Yes' if you want to add a static number to be added to your HTML, this will be used should the Calltracks code not work. Alternatively, you can just use your own phone number, in this case, select 'No'.
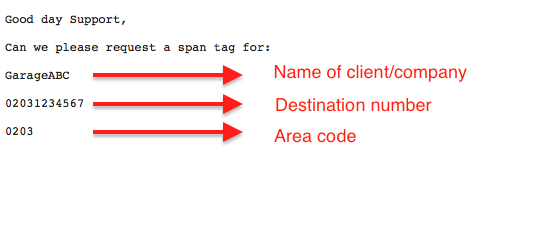
Step 4) Below you will see an example of a standard span tag request from a customer. Beneath that you'll see how you can put that request into practice using the number identifier wizard:
Example:
Above Example in practice:
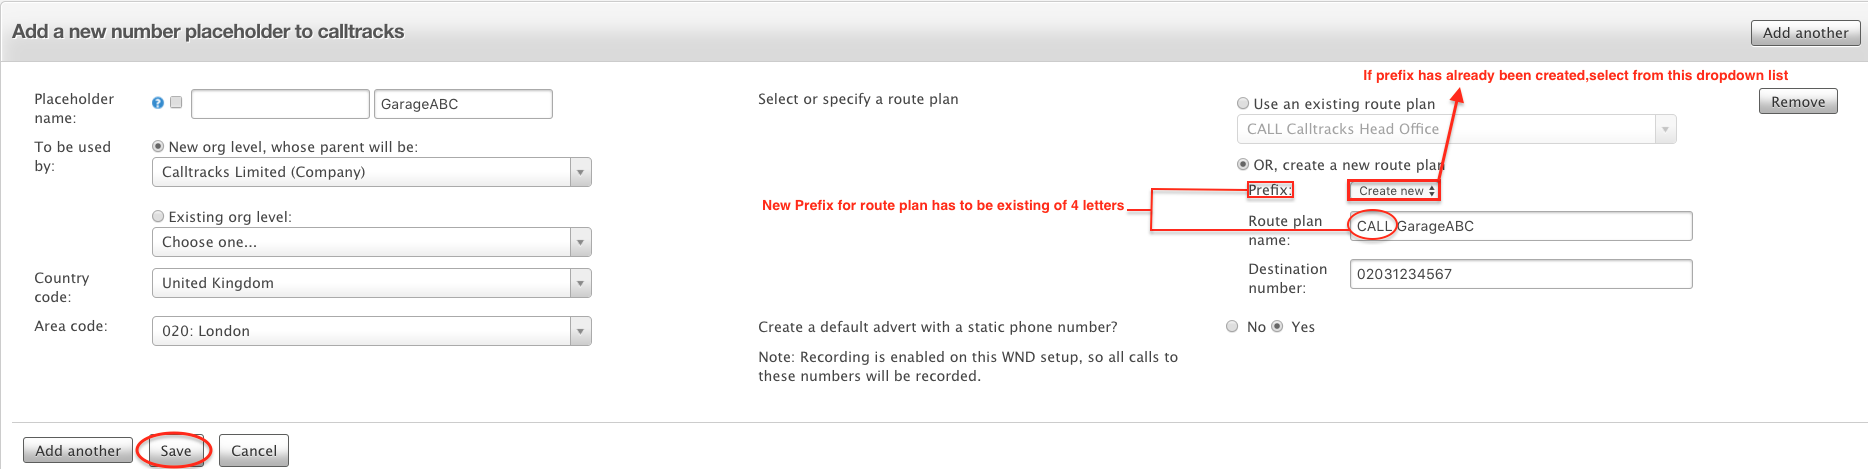
Once you have finished putting in your number identifier details click  at the bottom. If you want to start again and create one from scratch click
  and after that click
  to add another number identifier.
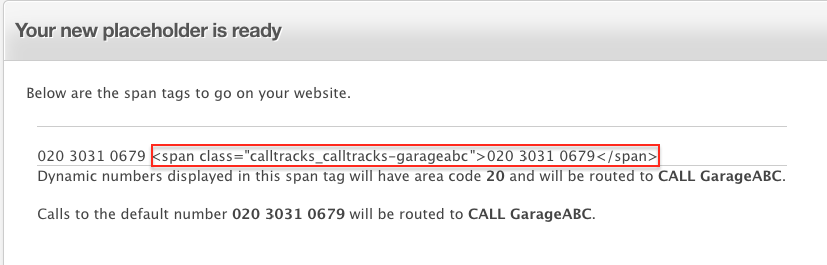
Step 5) Once you have clicked on Save you should see the following screenshot confirming your new span tag. The red circled part is your new span tag.
Key words: Span Tag, Number Identifier
Comments